
Maintain Your System: 7 Tips
You have successfully navigated the installation process. The solar panels are bolted to your roof, the inverter is humming in the garage, and your first "negative" Meralco bill has arrived. It is a feeling of relief and accomplishment. You have invested hundreds of thousands of pesos—perhaps anywhere from ₱150,000 for a small starter system to over ₱1,000,000 for a full hybrid setup with batteries.
Now comes the dangerous part: Complacency.
There is a pervasive myth in the renewable energy industry that solar power is "maintenance-free." While it is true that solar PV (photovoltaic) systems have no moving parts (unlike a diesel generator), they are not indestructible. In the Philippines, your system is exposed to a brutal combination of environmental stressors: intense UV radiation, torrential typhoon rains, salt spray in coastal provinces, and urban pollution in Metro Manila.
If you ignore your system, it will not necessarily break tomorrow. Instead, it will slowly bleed efficiency. A neglected system can lose 15% to 25% of its production capacity due to soiling and minor faults. On a 5kW system, that loss translates to thousands of pesos per year—money that should have been in your pocket.
To protect your Return on Investment (ROI) and ensure your equipment reaches its expected 25-year life, you need a proactive maintenance strategy. Here are 7 practical tips for maintaining your solar system in the Philippine setting.
1. Don't Rely on the "Free Wash" (Active Cleaning)
The most common question homeowners ask is, "Won't the rain clean the panels?"
In the Philippines, we have a distinct wet season (roughly June to November) and dry season (December to May). During the wet season, heavy downpours can indeed wash away loose dust. However, rain does practically nothing for sticky grime.
If you live in an urban area like Quezon City, Cebu, or Davao, vehicle exhaust creates an oily film on your panels. Dust settles into this film, and when light rain falls, it turns into mud that bakes onto the glass when the sun comes out. Bird droppings are even worse; they are acidic and opaque, creating "hard shading" that can cause hotspots and permanently damage the solar cells.
The Strategy:
You need a physical cleaning schedule. Relying on rain is like expecting a rainshower to wash your car—it might rinse off the top layer, but it leaves a dirty haze.
Frequency: For most residential areas, cleaning every 3 to 4 months is sufficient. If you live near a construction site or a busy highway, check them monthly.
Method: Use plain water and a soft sponge or a microfiber mop on an extendable pole. Do not use high-pressure washers (like Karcher) as the force can damage the silicone seals around the frame.
Timing: Never clean your panels between 9:00 AM and 4:00 PM. Spraying cold tap water on hot glass (which can reach 70°C) can cause thermal shock, shattering the panel instantly. Early morning or late afternoon is best.
For a deeper dive on creating a schedule specific to your location, read our guide on how often to clean your panels.
2. The Inverter Ventilation Audit
While solar panels are tough, the inverter is delicate. It is the "brain" of your system, full of sensitive electronics, capacitors, and processors. It is also the component most likely to fail first.
In the Philippines, heat is the primary killer of electronics. An inverter operating in a hot, unventilated garage will have a significantly shorter lifespan than one in a cool, shaded area. When an inverter gets too hot, it "derates," meaning it intentionally throttles its power output to protect itself. You might have 5kW of sun hitting your roof, but if your inverter is overheating, it might only convert 3kW.
The Strategy:
Check the Heatsink: Most inverters have metal fins on the back (the heatsink) to dissipate heat. Spiders and geckos love to build nests here. If these fins are clogged with cobwebs or dust bunnies, the inverter cannot cool down. Use a soft brush or a vacuum to clear them.
Check the Fans: If you have a larger hybrid inverter (5kW+), it likely has external cooling fans. Listen to them. Are they whirring smoothly, or do they sound like they are grinding? A failed fan leads to rapid overheating.
Airflow Space: Ensure no one has stacked boxes, old newspapers, or other "bodega" items around the inverter. Manufacturers typically require at least 30-50cm of clearance on all sides.
If you see warning lights or strange behavior, don't guess. Consult a resource on inverter error codes to determine if it's a simple overheat warning or a hardware fault.
3. The "Vegetation Creep" Check
Philippine flora grows incredibly fast. That mango tree or neighbor’s coconut palm that was nowhere near your roof during the installation two years ago might now be casting a shadow across your array.
Shadows are more destructive to solar production than clouds. Because solar panels are typically wired in series (like old Christmas lights), shading just 10% of one panel can reduce the output of the entire string by 30% or more. If a branch casts a solid shadow on a panel every day from 10:00 AM to 2:00 PM, that panel effectively becomes a resistor, heating up and potentially burning out.
The Strategy:
The Eye Test: Once a quarter, go outside at three key times: 9:00 AM, 12:00 PM, and 3:00 PM. Look at your roof. Are there any shadows touching the glass?
Trimming: Be aggressive with trimming trees. Remember that the sun's angle changes throughout the year. In December, the sun is lower in the southern sky, casting longer shadows than in June.
Debris: Leaves accumulating under the panels trap moisture, which can corrode the mounting clamps and damage roof shingles. Clear out leaf litter regularly.
4. Post-Typhoon Structural Inspection
We experience an average of 20 typhoons a year. Even if a storm doesn't rip your roof off, the intense wind vibration can wreak havoc on your solar mounting system.
Solar panels are clamped onto aluminum rails using "mid-clamps" and "end-clamps." Constant vibration from wind gusts can slowly loosen the bolts holding these clamps. If a clamp loosens, the panel is no longer grounded properly and, in a worst-case scenario, could detach during the next storm.
The Strategy:
After every major typhoon (Signal 2 or higher), perform a visual inspection from the ground or a safe vantage point.
Look for unevenness: Are the panels still perfectly flush with each other? If one panel looks slightly tilted or higher than the rest, a clamp has likely failed.
Check for debris impact: Look for cracks in the glass caused by flying branches. A cracked panel might still work, but moisture will eventually seep in and cause a fire hazard.
Wire Management: Look underneath the panels. Did the wind whip any wires loose? dangling wires rubbing against the abrasive roof surface will eventually strip the insulation, leading to dangerous ground faults.
Proper solar panel maintenance always involves checking the mechanical integrity of the mounting hardware, not just the electrical output.
5. Pest Control: The "Butiki" and Rodent Threat
In Europe/US, solar owners worry about snow. In the Philippines, we worry about pests.
Rodents: Rats and squirrels are attracted to the warmth of the solar array at night. Unfortunately, the insulation used on solar PV wire is often soy-based or simply has a texture that rodents love to chew. Exposed copper wires on a metal roof are a recipe for a short circuit and potential fire.
Geckos (Butiki): Lizards seek warmth, and your inverter is a nice warm box. If a lizard crawls inside the inverter vents and touches two live contact points on the circuit board, it will cause a catastrophic short circuit. This is such a common cause of failure that tech support teams often ask for photos of "fried lizards" before processing warranties.
The Strategy:
Rodent Proofing: Inspect the gap between your panels and the roof. If you have a high pest population, consider installing a "critter guard"—a mesh screen that wraps around the perimeter of the array to keep animals out.
Lizard Proofing: Check the mesh screens on your inverter's air intakes. Are they intact? If they are torn, replace them or add a fine mesh screen (mosquito net style) over the external vents, ensuring you don't block airflow.
Wire Check: Look for "bits" of black or red plastic on your roof or in the gutters. This is often the first sign that rats are chewing your cabling.
6. Trust the Data, Verify with the Bill
Most modern systems come with a fancy app (FusionSolar, ShinePhone, Sunny Portal, etc.) that shows you colorful graphs. These are great, but they can be misleading if the internet connection drops or the data logger glitches.
The Strategy:
The Daily Glance: Check your app once a day. You are looking for a smooth "bell curve" of production. If you see jagged drop-offs on a clear sunny day, you might have a loose connection or voltage issue.
The Bill Test: The ultimate source of truth is your Meralco (or local coop) bill. Compare your kWh usage and export credits year-over-year. If your bill for May 2025 is significantly higher than May 2024, and your lifestyle hasn't changed, your system is underperforming.
Compare Strings: If your inverter allows it, compare the voltage/amperage of String 1 vs. String 2. They should be roughly similar (if the panel count is the same). A major deviation usually points to a specific problem area.
Understanding the difference between normal degradation (panels lose about 0.5% efficiency per year) and a malfunction is key to assessing your solar system lifespan.
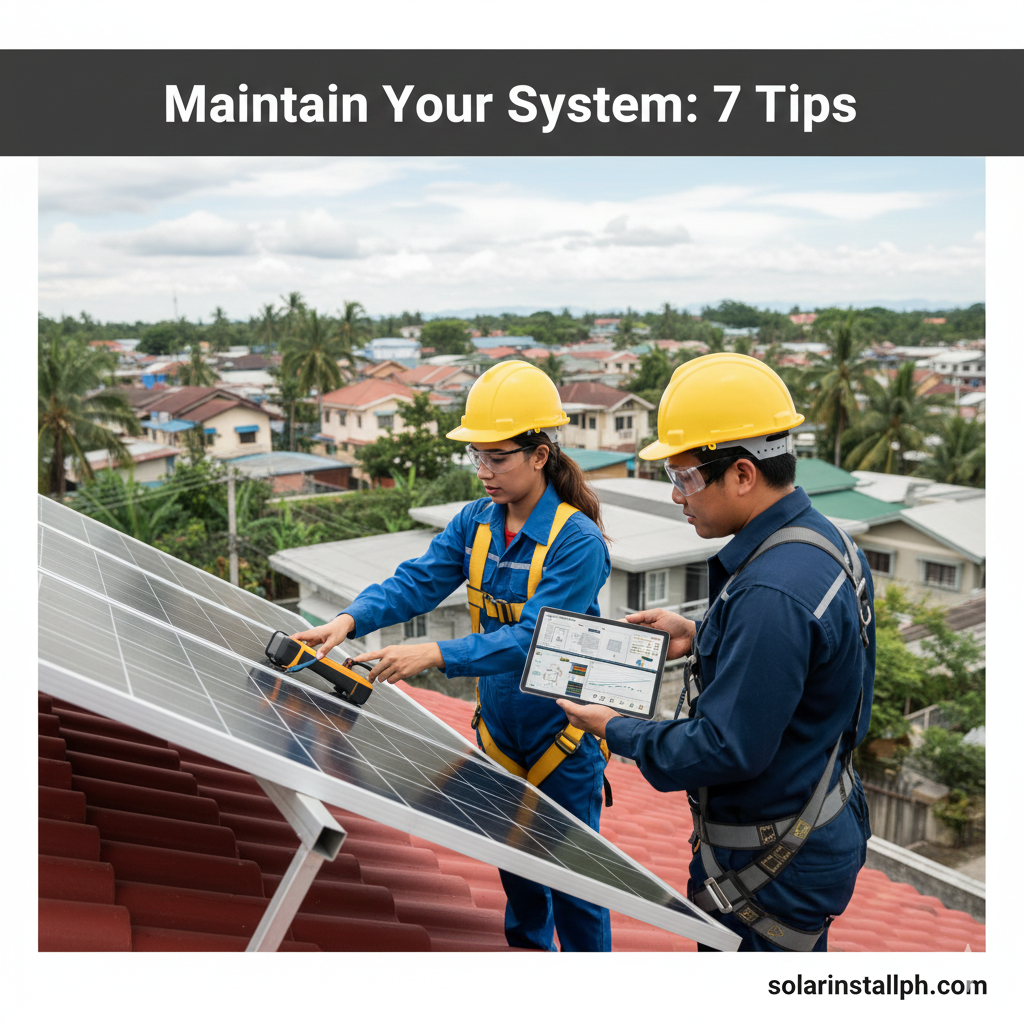
7. The Annual Professional "Torque & Test"
While you can do a lot of cleaning and visual checking yourself, you should budget for a professional electrical inspection once a year (or at least every two years).
Solar systems involve high-voltage DC electricity (often 400V to 800V). This is lethal and dangerous to touch. Furthermore, electrical connections degrade over time due to "thermal cycling"—the expansion and contraction of metal as it heats up during the day and cools at night. This loosens screw terminals.
A loose connection creates resistance. Resistance creates heat. Heat creates fire.
The Strategy:
Hire a certified solar technician to perform a "Preventative Maintenance Schedule" (PMS). This service typically costs between ₱3,000 to ₱6,000 depending on system size.
Torque Check: They will use a torque screwdriver to tighten every electrical connection in the AC and DC combiner boxes and the inverter to the manufacturer’s specifications.
Thermal Scan: Pros use a thermal camera to scan the panels and combiner boxes. A "hot spot" on a breaker or wire is an immediate red flag that a connection is failing.
Insulation Resistance Test: They test the integrity of the wire insulation to ensure no current is leaking to the ground.
This is also the time to have them perform checking solar wiring for any hidden damage you might have missed during your visual inspections.
Conclusion
A solar system is a low-maintenance asset, but "low" does not mean "zero." The harsh Philippine environment demands respect.
By following these 7 tips—cleaning regularly, managing vegetation, pest-proofing, and scheduling annual professional checkups—you are not just "fixing" problems; you are preventing them. You are ensuring that your system continues to offset expensive grid electricity for decades, maximizing the financial freedom that solar promises.
Don't wait for the red light on the inverter to blink. Take a look at your roof today.